Using a multimeter
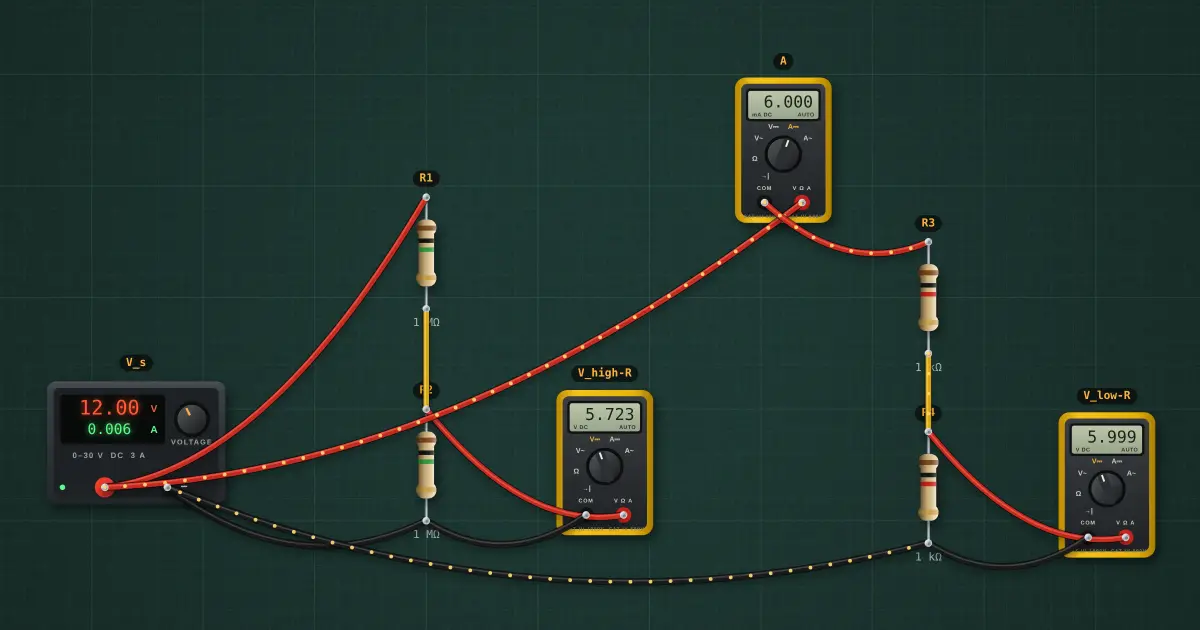
A voltmeter goes across a part (in parallel) and an ammeter goes in the loop (in series). Neither is perfect: the voltmeter’s 10 MΩ input loads a high-resistance circuit, and the ammeter’s 50 mΩ shunt adds a small drop.
Open this lesson in the labFree, in your browser, no account needed.
How it works
Without a meter, each divider gives Vs/2 = 6 V.
The meter’s 10 MΩ sits in parallel with R2: 1 MΩ ∥ 10 MΩ = 909 kΩ, so it reads 5.714 V, 4.8 % low.
Across 1 kΩ the same meter barely matters: 6 V. Rule: the meter should be at least 100× the resistance it measures across.
Ammeter: I = 6 mA, drop across its shunt = I × 50 mΩ = 300 µV.
Try it on the bench
- Change R1 and R2 to 10 kΩ: the high-R reading moves to within 0.1 % of 6 V.
- Select the ammeter and set it to volts mode: it reads 0 V, because it is in series with the loop and the voltmeter blocks the current.
- Put a meter in amps mode straight across the supply. Its 10 A fuse blows: an ammeter is nearly a short circuit.
- Ohms mode only works on a part that is out of the circuit: drag a spare resistor onto the bench, set a meter to Ω and clip it across.
Parts on the bench
- Bench power supply
- 4 × Resistor
- 3 × Digital multimeter
In the course
Zen’s Electronics Design Mastery, module “DC Fundamentals”.