Site assessment
Check a PV design against the real site: orientation, tilt, shade, the roof or ground structure and where the equipment goes. You will record what differs from the design so the installation is planned on facts, not assumptions.
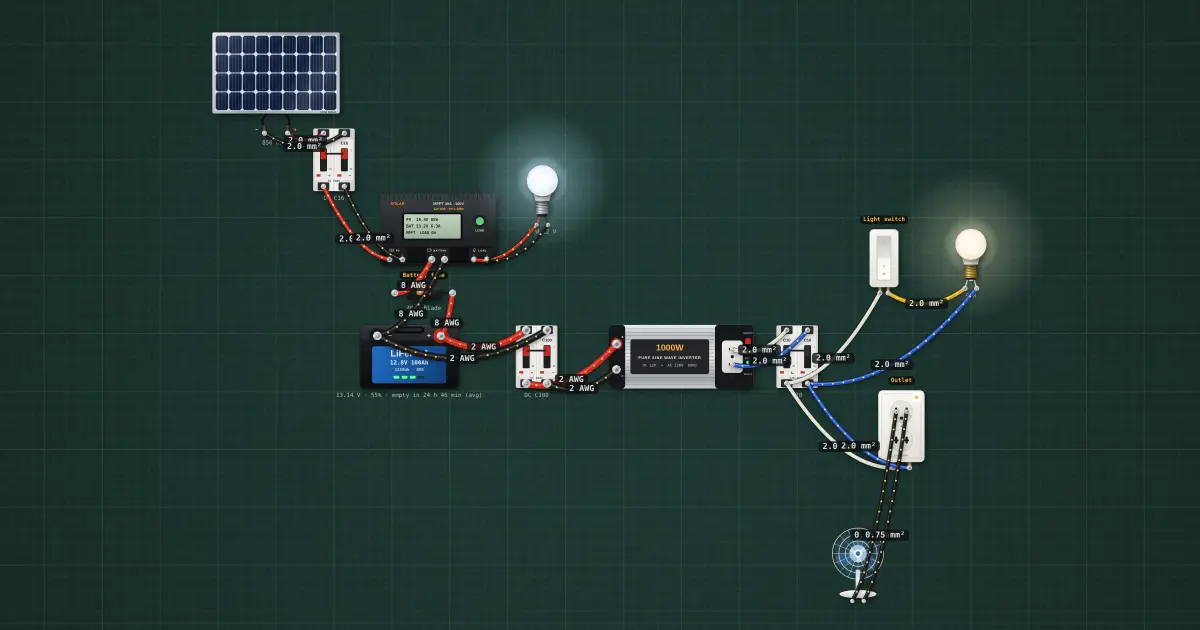
Open this lesson in the labFree, in your browser, no account needed.
How it works
Why validate the design
The design assumes a certain orientation, tilt, shade-free area, roof strength and cable length. If any of these is wrong, the system makes less energy than promised, or is unsafe. The site assessment is where you confirm each assumption or record the variance so the designer can adjust.
Orientation
Modules should face the equator, because that is where the sun is for most of the day. In the Philippines and anywhere in the northern hemisphere, face the modules south. In the southern hemisphere, face them north. Near the equator, the sun passes close to overhead and moves to the north for part of the year, so orientation matters less and a low tilt still works well; a few degrees east or west of true south costs little.
Use a compass, but remember it points to magnetic north. The difference from true north (the declination) is small in the Philippines but larger in other places; check it for the site. Keep the compass away from steel roofs, rails and vehicles, which pull the needle. A phone compass app with location turned on can show true north.
Tilt
A good starting tilt for year-round output is roughly the site's latitude. The Philippines lies between about 5° and 21° N, so tilts of about 10° to 20° are common. Do not go flatter than about 10° to 15°, even on the equator: steeper modules shed rain and the rain carries the dust away, and water does not pool on the frame edge. Measure the roof pitch with an angle finder; if the roof is flatter or steeper than the design, note it.
Shading survey
Shade is the biggest enemy of a PV array. Even shade on part of one module can cut a whole string's output (the shading and bypass diodes lesson explains why). The sun's path changes through the year: in the Philippines it is lower in the southern sky around December and passes close to overhead, or slightly to the north, around June. A shade-free spot in one month may be shaded in another.
- Check the array area for shade between about 9 am and 3 pm through the year, the hours that make most of the energy.
- Look for trees, neighbouring buildings, water tanks, antennas, poles, wires and parapets.
- Remember that trees grow and that neighbours build. Ask the owner about plans.
- A sun-path chart or a shade-analysis app helps; at minimum, stand at the array position, look toward the south (in the northern hemisphere) and note every object above a low angle.
Roof or ground structure
The mounting holds the modules for 20 years or more, through typhoons. Check:
- Condition: rust, rot, sagging, leaks, loose sheets. A roof that needs repair should be repaired before the array goes on, not after.
- Framing: find the purlins or rafters, their spacing, size and material. Brackets must fix into the framing, not just the roof sheet.
- Roof type: corrugated metal, long-span metal, concrete slab, tile. Each needs its own bracket and sealing method.
- Wind exposure: hilltops, coasts and roof edges see higher wind loads. Keep the array back from edges as the mounting system's instructions require.
- Corrosion: near the sea, salt spray attacks steel and mixed metals. Note it so the designer can choose stainless or aluminium parts and suitable fasteners.
For a ground mount, check soil, drainage, flooding, access by animals and people, and space for the frame and its footing. Structural adequacy is an engineering question; if in doubt, ask for one.
Where the equipment goes
The controller, battery and inverter should be:
- Close to each other, so battery cables (which carry the highest current) are short.
- As close to the array as practical, to keep DC voltage drop low.
- Ventilated, shaded and dry. Heat shortens battery life and derates electronics.
- Away from children, water, fuel and direct sun. Lead-acid batteries also need ventilation for hydrogen.
- On a wall or floor that can carry the weight, with the clearances the manuals give.
Cable routes and distances
Walk the route from the array to the equipment and from the equipment to the loads. Measure each run with a tape and add for bends, drops and terminations. Note where cables pass through the roof or walls, where they will be exposed to sun, and where conduit or raceway is needed. These lengths decide cable size, so write them down accurately.
Instruments for the visit
| Instrument | What you record |
|---|---|
| Compass (or phone with true north) | Roof and array orientation |
| Angle finder | Roof pitch |
| Measuring tape | Roof dimensions, framing spacing, cable runs |
| GPS or phone | Latitude and longitude of the site |
| Camera | Roof, framing, shade sources, equipment location, existing wiring |
Variances and the installation data sheet
A variance is anything on the site that differs from the design: a different orientation or pitch, a new shade source, a weak roof, a longer cable run, a different equipment location. Record each one with the measurement and a photo and report it before installation starts.
The installation data sheet brings it together: site name and location, latitude, orientation and tilt, array area and layout, shade notes, structure details, equipment location, cable run lengths, and the list of variances and what was decided about each.
Logistics
Plan how the materials get to the site (road access, boats for island sites, the weight of batteries), where they are stored and how they are secured overnight. Set a schedule around the weather: avoid the height of typhoon season for roof work if you can, and plan roof work for the cooler hours.
On the job
- Orientation measured, corrected to true north.
- Roof pitch measured and compared with the design.
- Shade checked from about 9 am to 3 pm, across the seasons; trees noted.
- Framing found, condition and corrosion recorded.
- Equipment location ventilated, shaded, close and safe.
- Cable runs measured; variances recorded; data sheet complete.
Try it on the bench
- Set the panel’s sunlight to 1000, 600 and 300 W/m² and read the controller’s charging current each time: this is what a poor site or part shade costs you.
- Click the wire from the panel to the controller, choose a thinner size and run the 🛡 Safety check: the wire has to suit the current and the run you measured on site.
- Start a ⏱ Test run with full sun and with low sun and compare how much energy reaches the battery.
Parts on the bench
- Solar panel
- 2 × DC breaker
- Solar charge controller
- LiFePO4 battery
- Power inverter
- AC breaker
- 12 V DC LED bulb
- 220 V bulb
- 220 V desk fan
- Wall switch
- Wall outlet
- Fuse
In the course
PV Systems Installation (NC II-aligned), module “4 · Site assessment”.